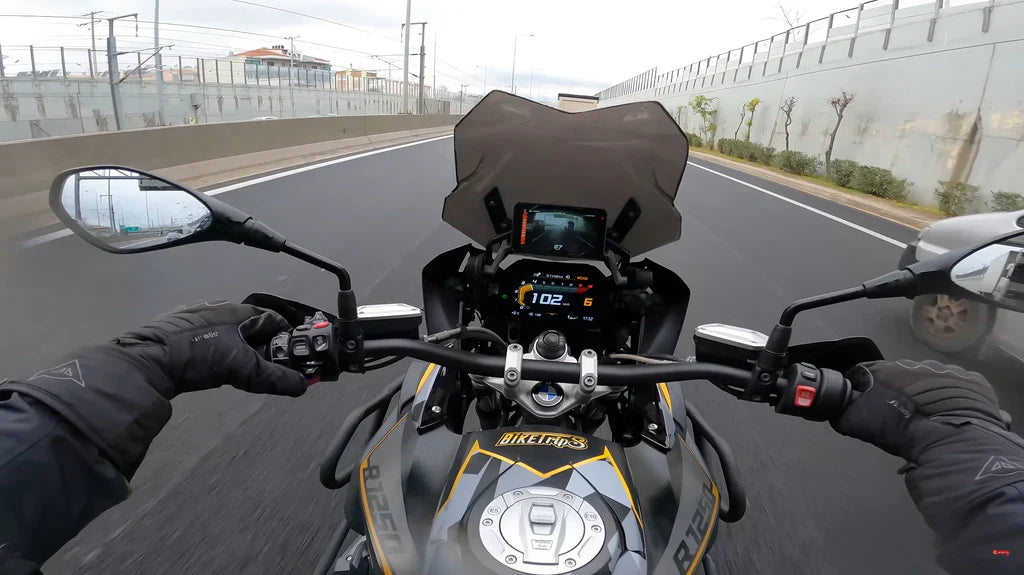
For those interested in the AIO-5 Lite's features and seeking to confirm its compatibility with their motorcycle, this guide provides a clear and concise procedure for verifying fitment and identifying optimal mounting solutions tailored to individual riding requirements.
To begin, an overview of the AIO-5 Lite's operational parameters is provided. The AIO-5 Lite, in conjunction with its dual camera system, is designed to function within a voltage range of 12 to 18V, requiring a working current of 0.6A/7.2W. Consequently, if your motorcycle battery's output falls within this specified range, and the device is directly connected to the battery's positive and negative terminals via the included wiring harness, stable operation will be achieved.
It is imperative to note that power supply via USB ports is strongly discouraged due to the inherent potential for voltage instability and power insufficiency. USB ports are designated solely for after-sales diagnostics or device testing. Therefore, for electric motorcycle applications, careful consideration of these power supply requirements is essential to ensure proper device functionality.

How to install AIO-5 Lite?
- Prior to installation, a thorough review of the wiring and power connection specifications is essential.
- Implementation of the AIO-5 Lite involves the following technical steps: installation of the handlebar mount, mounting of the AIO-5 Lite main unit, adhesive camera unit placement utilizing 3M adhesive, establishment of electrical and power connections, installation of the external GPS receiver, execution of a power functionality test, and completion of the system setup. For optimal installation performance, ensure the yellow wire is connected to the vehicle's ACC (accessory) circuit. The yellow wire serves as the designated ACC wire and must be properly integrated into the accessory circuit for correct operation.
- For detailed guidance on AIO-5 Lite setup, including installation procedures, tutorials, and optimal mounting recommendations, please consult the complete guide.
Recognizing the wide variety of motorcycle types, we have engineered tailored solutions to confirm ideal installation suitability for specific models.
Standard Bracket
A standard mounting bracket, designed to accommodate tubular structures with diameters between 22mm and 32mm, is provided within the package. This bracket is supplied with three size adapters (22mm, 25mm, and 28mm) for enhanced adaptability.

Therefore, provided a tubular structure of suitable diameter (22-32mm) is located proximate to the motorcycle's dashboard, this mounting bracket facilitates installation. It enables adaptable placement, accommodating left, center, or right positioning as desired.

MFP0022 Crossbar Mount (Optional)

This configuration enables central positioning of the device in front of the windshield's crossbar, thereby preventing obstruction of the original instrument panel or keyhole. This arrangement provides the rider with an unobstructed field of view, facilitating navigation across diverse terrains and during adventurous pursuits.

We encourage you to proceed with confidence and not allow uncertainty to impede your transition to an enhanced motorcycle riding experience. Our organization is committed to providing solutions that seamlessly align with your individual lifestyle and riding preferences. To ensure broad compatibility, our product offerings are designed to integrate with over 95% of motorcycle models. We underscore the importance of proper device configuration to optimize your riding experience.
We trust that the information presented has effectively addressed any concerns and will facilitate a timely and informed decision. With the appropriate configuration, you can confidently embark on your journey, focusing on the forthcoming adventure.

